More and more states are requiring that educational content meet certain accessibility requirements.
Here is a List of Best Practices to make accessible decks:
- Add accessibility text to all relevant Sounds and Images
- Use proper Z-order
- Use sharp Color Contrast
We will cover what these mean in this article. You can also skip ahead using the table of contents below.
TABLE OF CONTENTS
- Enabling Accessibility with Self-Made Decks
- Using Alt Text (Alternative Text) / Accessibility Text
- Proper Z Order
- Proper Color Contrast for Backgrounds and Text
- Using Custom Sounds
- On-Screen Keyboards
- Accessibility within the Boom Card Player
- Checking Your Deck's Accessibility
Enabling Accessibility with Self-Made Decks
Using Alt Text (Alternative Text) / Accessibility Text
ALT text, also known as alternative text, or ALT attributes, are snippets of text that describe the content of an image or a sound. You should add ALT text to each image and sound in your deck to help with accessibility.
Your ALT text should offer a descriptive explanation of any required image or sound. It will be read by accessibility programs or screen readers, so it should accurately describe the image or sound to a person with impaired vision or is deaf/hard of hearing. If content that is necessary to understand the card is present in an image or a sound, it must be in the Alt text. Check out this video:
Adding Alt Text to your Deck
You can add A text to your images or sounds using the image/sound properties panel by clicking on "Accessibility Text." If there is missing text, a red "MISSING" message will appear. Once Accessibility Text is added this will no longer show.

Missing Accessibility Text will also be called out in the Selectable List with red text, shown below.

It is imperative that you do NOT leave the alt text blank. If you leave it blank, your deck will NOT be considered accessible, it will NOT be found in accessible-filtered searches, and it will NOT score as high in our search algorithms. We may guess and try to invent alt text if you leave it blank. If you do not want to provide a text equivalent for a sound/image, enter "none" in the "Accessibility Text" field.
NOTE: If you DO NOT WANT the screen reader or sound interpreter to read or display a text representation of your image or sound (b/c it is a background or decorative image/sound) that is NOT constructive to the learning content of the card, then enter "none" in the "Accessibility Text" field.
Sounds
The Accessibility text for sounds is intended for learners who required auditory accommodations which can include but is not limited to learners who are deaf/hard of hearing, have auditory processing disorders, or are in an environment where they cannot listen to sounds.
You can add alt text to your sounds using the Sound properties panel or the selectable list by clicking on "Accessibility Text."

If you added an image background to your sound, you should include accessibility text describing the image in the second line, shown below. The description for the image is only required if you have provided your own custom image.
 Our Player allows student to enable "Sound to Text" in their sound settings.

When this is turned on the Accessibility text will display on the screen when the sound is played, shown below, allowing the student to understand the sound's content or it's context in the card.

Without ALT text, Accessibility tools may skip the sound altogether or offer a notice to the user that no description is offered.
Images
Accessibility text for images that are required for user comprehension should be short snippets of text that describe the image in as few words as possible.
Here is an example of accessibility text entered into the Accessibility Text modal:

Here is another example with a more complex image with content that is necessary to understand the card:

Screen readers will read the ALT text of the image, allowing the student to understand the image's content or its context in the card. Without descriptive text, the program may skip the image altogether or offer a notice to the user that no description is offered.
Optional Accessibility Text
There are a few places where Accessibility text can be added but is not required.
Card Accessibility text
The Card accessibility text can be used to describe flattened background images or offer a description of the general concept of the card to help explain to visually impaired learners what the Card is.

If the card has a busy background image that can help give context to the card, the "card" accessibility text should describe the background image.
Fill-In-The-Blank
You can add Accessibility text to a Fill-in-the-Blank answer in the Fill-in-the-Blank Properties box, shown below.

The best use of this optional field is to restate the question you want the student to type. But you can also use it to "describe" the part of the answer you are looking for.
For example: the alt text for an FiB could be, "What is the third planet from our sun called?" to restate a question. Or, in a math problem you might have 2 different FiBs with text: "What is the numerator?", "What is the denominator?"
Sound Background Image
If you added an image background to your sound, please include accessibility text describing the image in the second line, shown below.

Adding Accessibility Text to Flattened Background Images
We have seen many users who have made portions of their cards on external platforms and added the image as the background image. The problem with that is that Background images cannot have accessibility text.
To get around this you can use the optional Card Associability text to describe Background image as well as use empty Text elements including text boxes and buttons to "Circle" elements in the background image that requires accessibility text.
Using Text Elements to add Accessibility Text
First you will need to drag over a new Text element to your card. A text element is any element in a Boom Card that supports Text including Text boxes and Buttons.
Accessibility text can only be added to Blank Text Elements. This means you will need to remove the Template text, for Text boxes, you will need to remove "Click to edit text." and for Buttons you will need to remove "Button". So you are left with an empty box, shown below. 
Once the text element is empty, click away to unselect the element and click back on it and the Optional Accessibility Text will appear in the Text Properties box.

In the example below the Number line is apart of the background image. We chose to use a Text Box to circle the Number line and add the accessibility text "A number line with 5, 10, blank, 20, and 25 listed" to give context for a visually impaired user. 
If you have elements in your Background image that you want to be selectable, you can use a Button to add accessibility text and have it marked as a correct/incorrect answer.
Adding Accessibility Text to Your Decks from the Image and Sound Library
You can add Accessibility text directly from your Studio for your self-created or self-uploaded Sounds and Images by clicking edit details.
 The Accessibility text added from your Library will be applied to all NEW decks that use that sound or image file from here on out! If you want to add the accessibility text from your Library, you now can!
By clicking the Import from Library button, you will be importing all accessibility text added in your image and sound Library to your deck!

Please Note: If you have uploaded the same image or sound files multiple times... those have all been duplicated. Each file copy will refer to its own accessibility text.
Proper Z Order
When creating your decks, you can ensure your decks are set up to allow for Screen readers and Keyboard navigation by using Proper Z-order.
Proper Z-Order means that when a student is using your card with alternative methods, they will experience the card as intended.
Things to ask yourself when creating a card pertaining to Z Order:
- How would you like Students who use a keyboard or accessibility tools to interact with your deck?
- What order would you like learners who cannot see to hear/answer questions and prompts in your deck?
Use Z-Order to arrange your card's elements chronologically. The higher in the Selectable List, the earlier the Screen reader, tab key, or Navigation button will interact with the element.

You can use the Z-Order section, shown below, to move your elements.

You can learn more about Z-Order in the article Z-Order - Moving Objects In Front of or Behind Other Objects
Proper Color Contrast for Backgrounds and Text
Proper color contrast refers to having enough contrast between your Card background color and your Text color. We do not have an internal Color contrast tool, please use an external tool for contrast recommendations, like This One in accessibilitychecker.org.
You can select a solid color or upload an image as a background for the selected card to create more contrast to improve visibility. Add these to the template card to apply the same background to all cards in a deck.

You can also change the color of text boxes, including the text itself or the background color behind the text.


Using Custom Sounds
Creating cards with custom sounds is an important feature included with our Premium, Publisher, and School memberships. Sounds can be used to aid students with special needs, English as a second language, or those who need assistance with vocabulary development.
Images can be added to the sound to give it a different appearance than the default "speaker" image. Sounds cannot be clickable answers but can be made into draggable objects for a drag-and-drop answer format.
You can upload your custom sounds by clicking on the Studio tab and then clicking "Sounds" under Asset Managers.

Here are all of our Creating with Sound FAQ articles: Creating with Sound
On-Screen Keyboards
For special symbols or language-specific characters, you can add an on-screen keyboard for students to use. This makes fill-in-the-blank answers much easier for students who need to use mathematical symbols or other characters not traditionally found on an English keyboard. Here is an example using the Spanish on-screen keyboard:

Accessibility within the Boom Card Player
Students can use their keyboard to move through cards in a deck and to select fill-in-the-blank answers. We continue to invest in accessibility improvements throughout the Boom Cards application.
Creators can ensure their decks are properly set to allow for Keyboard navigation by using Proper Z-order.
Proper Z-order means that when a student is using your card with alternative navigation techniques, they will experience the card as intended.
Arrow Key Navigation
Instead of relying on a mouse or trackpad, students playing Boom Decks can navigate between cards using the arrow keys: left for "Previous" and right for "Next/Skip".

Note: Arrow keys do not function as navigation keys on Flow Magic decks because the Flow Magic cards are designed to navigate in a particular order depending on the student's interaction.
Tab Key Navigation
The Tab key can be used to select answers on a card. A touch screen or a mouse is currently required to interact with drag and drop elements, but keyboard support is under development.

When you reach a fill-in-the-blank text box, the cursor will automatically appear in the box and will allow students to type their answers. They can submit the answer by pressing the Enter key.
If there are multiple fill-in-the-blank text boxes on one card, pressing the Tab key will move through them based on their z-order. This is important to note for creators. If the fill-in-the-blank boxes are placed on the card in a random z-order, tab navigation will be equally random and unclear.

Checking Your Deck's Accessibility
You can check your deck's accessibility from your Deck Details in the Play tab using the Scan for Compliance button!
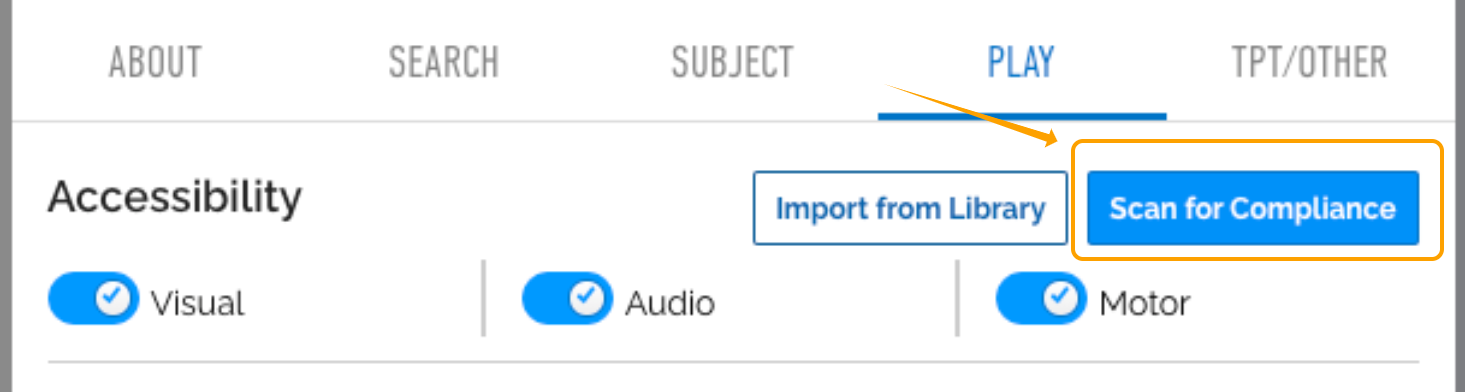
The Scan for Compliance button scans your deck for Accessibility text in all image or sound elements.
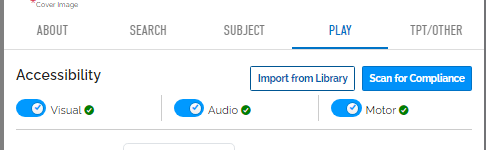
If your deck does not have any issues flagged, you will see green check marks next to the element you are compliant with.
If you have any cards with imported back ground images or other elements that need to use Optional Alt text to be accessible, the Scan for Compliance button will not pick it up. Please add all Alt text to your decks to make them accessible.
Opting out of Accessibility
Opting out your decks is simple; all you have to do is switch the accessibility toggles to Off. The toggles can be found in your deck details under the play tab.

If your deck is successfully opted out, the toggle will be red in your deck details, and you will see gray icon(s) in your Studio.


Below is information you can use to inform your decision to keep your decks opted in or opt them out:
Visual accessibility means all the images in this deck (if any) are labelled and accessible for blind/vision impaired learners and proper z-order is used.
- If you opt out, it means this deck should NEVER be used by a low-vision learner because it requires visual identification.
- eg: flashlight game, identify shapes or objects
Audio means all the sounds (if any) are captioned and the deck is accessible for deaf/hearing impaired Learners.
- If you opt out, it means this deck should NEVER be used by deaf/hard of hearing learners because it requires sound identification.
- eg: identify musical notes, sounds, pronunciation or animal sounds
Motor means the deck does NOT have heavy or any use of Drag/Drop and proper z-order is used and the deck is accessible for users who required alternative navigation tools, such as Tab navigation or a switch.
- If you opt out, it means this deck should not be used by learners who require, alternative motor tools because it requires significant deck navigation such as drag and drop.
- The Boom Team is still evaluating guidelines for motor accessibility and working on keyboard accessibility for drag/drop; we will provide more information at a later time.
Accessibility Badges
There are 3 badges that correspond to each way a deck can be accessible. The first badge, an eye, corresponds to Visual accessibility. The second badge, an Ear with a slash, corresponds to decks with Audio accessibility. The third badge, a cursor, corresponds to Motor accessibility.

If your deck in fully accessible and you did NOT opt out of accessibility for Visual, Audio, or Motor your deck will have all blue badges in your studio, shown below.

If you opted out of accessibility for Visual, Audio, or Motor your deck will have a grayed out Badge. In the example below the deck is opted out of accessibility for Motor, you can see the Gray Motor badge.

If your deck is not accessible or if your deck has not been scanned yet, your Badges will be Red. The deck below has accessibility text for all of their sounds but is not accessible for users who need accessibility features for visual and motor. 
The Boom Team is constantly working to make our platform accessible to more people. Please stay tuned for announcements as we develop more accessibility features. If you have any decks that you have specific questions about, you can email us at Help@boomlearning.com and an agent will happily help you.